The basic operation of gas welding includes the ignition, regulation, and extinguishing of the oxy-acetylene flame, starting welding, the movement of the welding torch and welding wire during welding, and the key techniques for jointing and finishing. Gas welding can be divided into left-hand welding and right-hand welding, depending on the direction of the welding torch movement and the front-to-back position of the welding torch and welding wire.
(I) Ignition, Regulation, and Extinguishing of the Oxy-Acetylene Flame
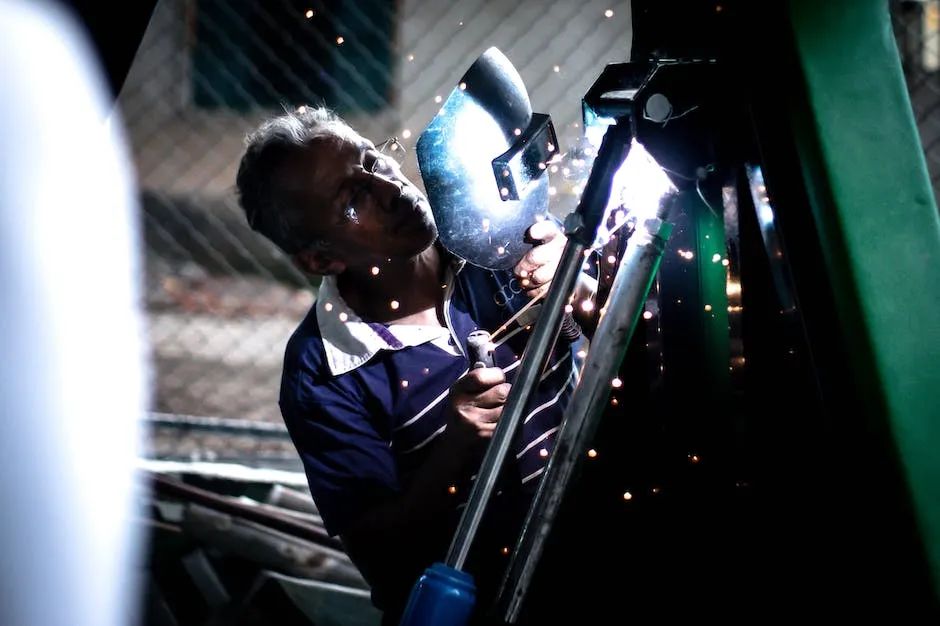
The welding torch should be held in the right hand, with the thumb and index finger positioned on the oxygen regulating valve. The thumb can also open and close the acetylene regulating valve to adjust the gas flow at any time.
To ignite the flame, first slightly open the oxygen regulating valve, then the acetylene regulating valve. The two gases mix in the welding torch and are ejected from the welding nozzle. At this point, bring the nozzle close to the flame to ignite. When igniting, do not hold the torch directly against the welding nozzle with the hand holding the flame, and do not point the nozzle at other people or flammable materials to prevent accidents. When you first ignite, you may hear a continuous “pop” sound. This is because the acetylene is impure and needs to be released to re-ignite. Sometimes, ignition may be difficult, often because the oxygen level is too high. In this case, the oxygen regulating valve should be turned down.
Regarding flame adjustment, the newly ignited flame is generally a carburizing flame. Adjust the oxygen and acetylene regulating valves according to the type and thickness of the material being welded until the desired flame properties and flame energy are achieved. Gradually opening the oxygen regulating valve until the inner and outer flames and the flame core are clearly defined is considered a neutral flame. Further increasing oxygen or decreasing acetylene results in an oxidizing flame; increasing acetylene or decreasing oxygen results in a carburizing flame. Increasing both acetylene and oxygen simultaneously increases the flame energy. If the flame energy is still insufficient, replace the welding nozzle with a larger diameter. The adjusted flame shape should not be distorted or produce any squeaking noises. If the flame is abnormal, use a needle to remove impurities from the welding nozzle. Only weld after the flame is normal. Sometimes, uneven acetylene supply to the welding torch can cause unstable flame properties, causing a neutral flame to automatically transform into an oxidizing or carbonizing flame. Therefore, during gas welding, you should constantly monitor changes in flame properties and adjust the oxygen control valve promptly.
Xinfa welding equipment has the characteristics of high quality and low price. For details, please visit: Welding & Cutting Manufacturers – China Welding & Cutting Factory & Suppliers (xinfatools.com)
Flame extinction. When extinguishing the flame, close the acetylene control valve first, then the oxygen control valve. Otherwise, a large amount of carbon ash (black smoke) will appear.
(2) Starting Welding: At the beginning of welding, the weldment temperature is low or close to ambient temperature. To facilitate the formation of a molten pool and preheat the weldment, the welding nozzle should be tilted at a larger angle, and the flame should be moved back and forth at the starting point to ensure uniform heating of the weld.
If the two weldments are of unequal thickness, the flame should be slightly tilted toward the thicker piece to ensure that the temperature on both sides of the weld is roughly the same, melting uniformly, and the molten pool is located exactly at the weld seam. When a bright, clear molten pool forms at the starting point, you can add welding wire and move the torch forward to continue welding normally. During welding, the flame should be directed correctly to ensure consistent temperatures on both sides of the weld. This prevents the molten pool from being centered and skewed toward the hotter side, which could cause the weld to skew after solidification. The tip of the inner flame core should be 3-5 mm from the surface of the molten pool, maintaining the size and shape of the molten pool throughout.
When selecting the starting point for flat butt welds, welding should generally be performed 30 mm from one end of the weld. This ensures that the weld is located within the plate, providing a large heat transfer area. By the time the base metal melts, the surrounding temperature has already risen, making it less likely to crack during condensation. When welding pipes, the starting point should be between the two tack welds.
(3) Movement of the welding nozzle and wire during welding: To control the heat of the molten pool and achieve high-quality welds, the nozzle and wire should oscillate evenly and in a coordinated manner. The movement of the nozzle and wire involves three actions:
1. Moving along the longitudinal direction of the weld, continuously melting the workpiece and wire to form the weld.
2. The welding nozzle oscillates horizontally along the weld seam to fully heat the workpiece, stirring the liquid metal evenly and achieving a dense weld. Generally, the amplitude of the oscillation should increase with increasing plate thickness.
3. The welding wire is fed perpendicular to the weld seam and moved up and down to adjust the heat of the molten pool and the amount of wire added.
Similarly, during welding, the welding nozzle should move longitudinally and oscillate horizontally along the weld seam while also bouncing up and down to adjust the temperature of the molten pool. In addition to forward and up and down movement, the welding wire should also oscillate horizontally when using flux to stir the molten pool.
During normal gas welding, the angle between the welding wire and the workpiece surface is generally 30° to 40°, and the angle between the welding wire and the centerline of the welding nozzle is 90° to 100°. The coordinated movement of the welding nozzle and welding wire ensures thorough and uniform weld metal penetration while avoiding defects such as burn-through and overheating, resulting in a high-quality, aesthetically pleasing weld.
The oscillation method and amplitude of the welding nozzle and wire depend on factors such as the thickness and material of the weldment, the spatial position of the weld, and the weld size.
When filling wire during gas welding, during normal welding, the welder should not only closely monitor the formation of the molten pool but also preheat the end of the wire under the outer flame. Once the molten wire droplet enters the molten pool, the wire should be immediately lifted to allow the flame to move forward, forming a new molten pool. The wire should then be fed into the pool again, repeating the cycle to form the weld.
To achieve a high-quality weld joint, the shape and size of the molten pool should be consistently maintained. If the required flame power is high, due to the high welding temperature and rapid melting rate, the wire should be kept at the front of the flame core to ensure continuous addition of molten wire droplets to the pool. If the required flame power is low, due to the slow melting rate, the wire feeding rate should be slowed accordingly. When welding with flux, the molten pool should also be stirred with the wire to cause oxides and non-metallic inclusions in the pool to float to the surface. When welding with a large gap or thin-walled welds, direct the flame core directly at the welding wire, using the welding wire to block some of the heat. Simultaneously, move the welding tip up and down to prevent premature melting of the weld edge or the front of the weld pool.
(4) Joint and Finishing: When welding is paused midway and then restarted at the point where the weld was paused, the portion that overlaps the original weld is called the joint. When welding to the end of the weld, the welding process ends.
When making a joint, use the flame to reheat the original weld pool until it melts, forming a new weld pool. Then, add welding wire and restart welding. Ensure that the molten wire droplet fully fuses with the molten original weld metal. When making a joint, overlap the previous weld by 5-10 mm. Minimize or eliminate the addition of welding wire in the overlap to ensure the proper weld height and a smooth transition between the joint weld and the original weld.
During the finishing phase, due to the high weld temperature and poor heat dissipation, the nozzle’s tilt angle should be reduced, the welding speed should be increased, and more wire should be added to prevent the molten pool from expanding and burn-through. During the finishing phase, the flame should be raised and slowly withdrawn from the molten pool until the pool is completely filled. In short, the key to finishing gas welding is to maintain a small tilt angle, increase the welding speed, add wire quickly, and keep the molten pool full.
In addition to the basic operating methods mentioned above, the nozzle’s tilt angle is constantly changing during gas welding. Generally, during the preheating phase, to quickly heat the weld and form a molten pool, the nozzle’s tilt angle is 50° to 70°; during normal welding, the nozzle’s tilt angle is 30° to 50°; and during the finishing phase, the nozzle’s tilt angle is 20° to 30°.
(V) Left-hand and Right-hand Welding Methods: Left-hand welding or left-hand welding occurs when the torch moves from right to left; right-hand welding or right-hand welding occurs when the torch moves from left to right.
In the left-hand welding method, the torch flame is directed away from the weld seam and toward the unwelded portion of the workpiece, and the torch flame moves behind the welding wire (see Figure 4-12a for details). The basic advantages of the left-hand welding method are: simple operation, easy mastery, and suitability for welding thinner workpieces with lower melting points, making it widely used. However, it also has disadvantages: the weld metal is easily oxidized, cools rapidly, and has low heat utilization. When using the left-hand welding method, the welder can clearly see the solidified edge of the upper molten pool and achieve a weld with uniform height and width. Because the welding flame is directed toward the unwelded portion of the workpiece, it also preheats the metal.
The left-hand welding method is generally used for welding thin plates less than 5 mm and low-melting-point metals and offers high production efficiency.
In the right-hand welding method, the torch is directed toward the weld seam, and the welding flame moves ahead of the welding wire (see Figure 4-12b for details). When using the right-hand welding method, the welding flame is always directed toward the molten pool, creating a shield that isolates the entire pool from the surrounding air. This prevents oxidation of the weld metal, reduces porosity and slag inclusions, and allows the molten pool to cool more slowly, thereby improving the weld microstructure. Furthermore, because the flame core is closer to the molten pool and the flame is blocked by the groove and weld, the heat of the welding flame is more concentrated, effectively utilizing the flame energy. This results in greater penetration, deeper penetration, and improved productivity. The main disadvantages of the right-hand welding method are that it is difficult to master and does not preheat the weldment, making it less commonly used.
The right-hand welding method is primarily suitable for welding thicker welds or welds with higher melting points.
Post time: Jul-29-2025


